202: How to create a task
Now that you understand what tasks are and why they are utilized, you will learn how to create the steps, which are the building blocks of a task. Steps are pieces of a procedure containing a title and instructions meant to help complete what the title is prompting. These steps, when combined to create a task, can do anything from diagnosing a problem, guiding the user to fix the equipment, providing crucial information, preparing you with required tools or theory, or acting as a tool to collect data from the user for the author.
This section will teach you to add the simplest form of a step; it will provide information to the user without prompting them to input any type of data.
Please go through the following to learn how to create a task
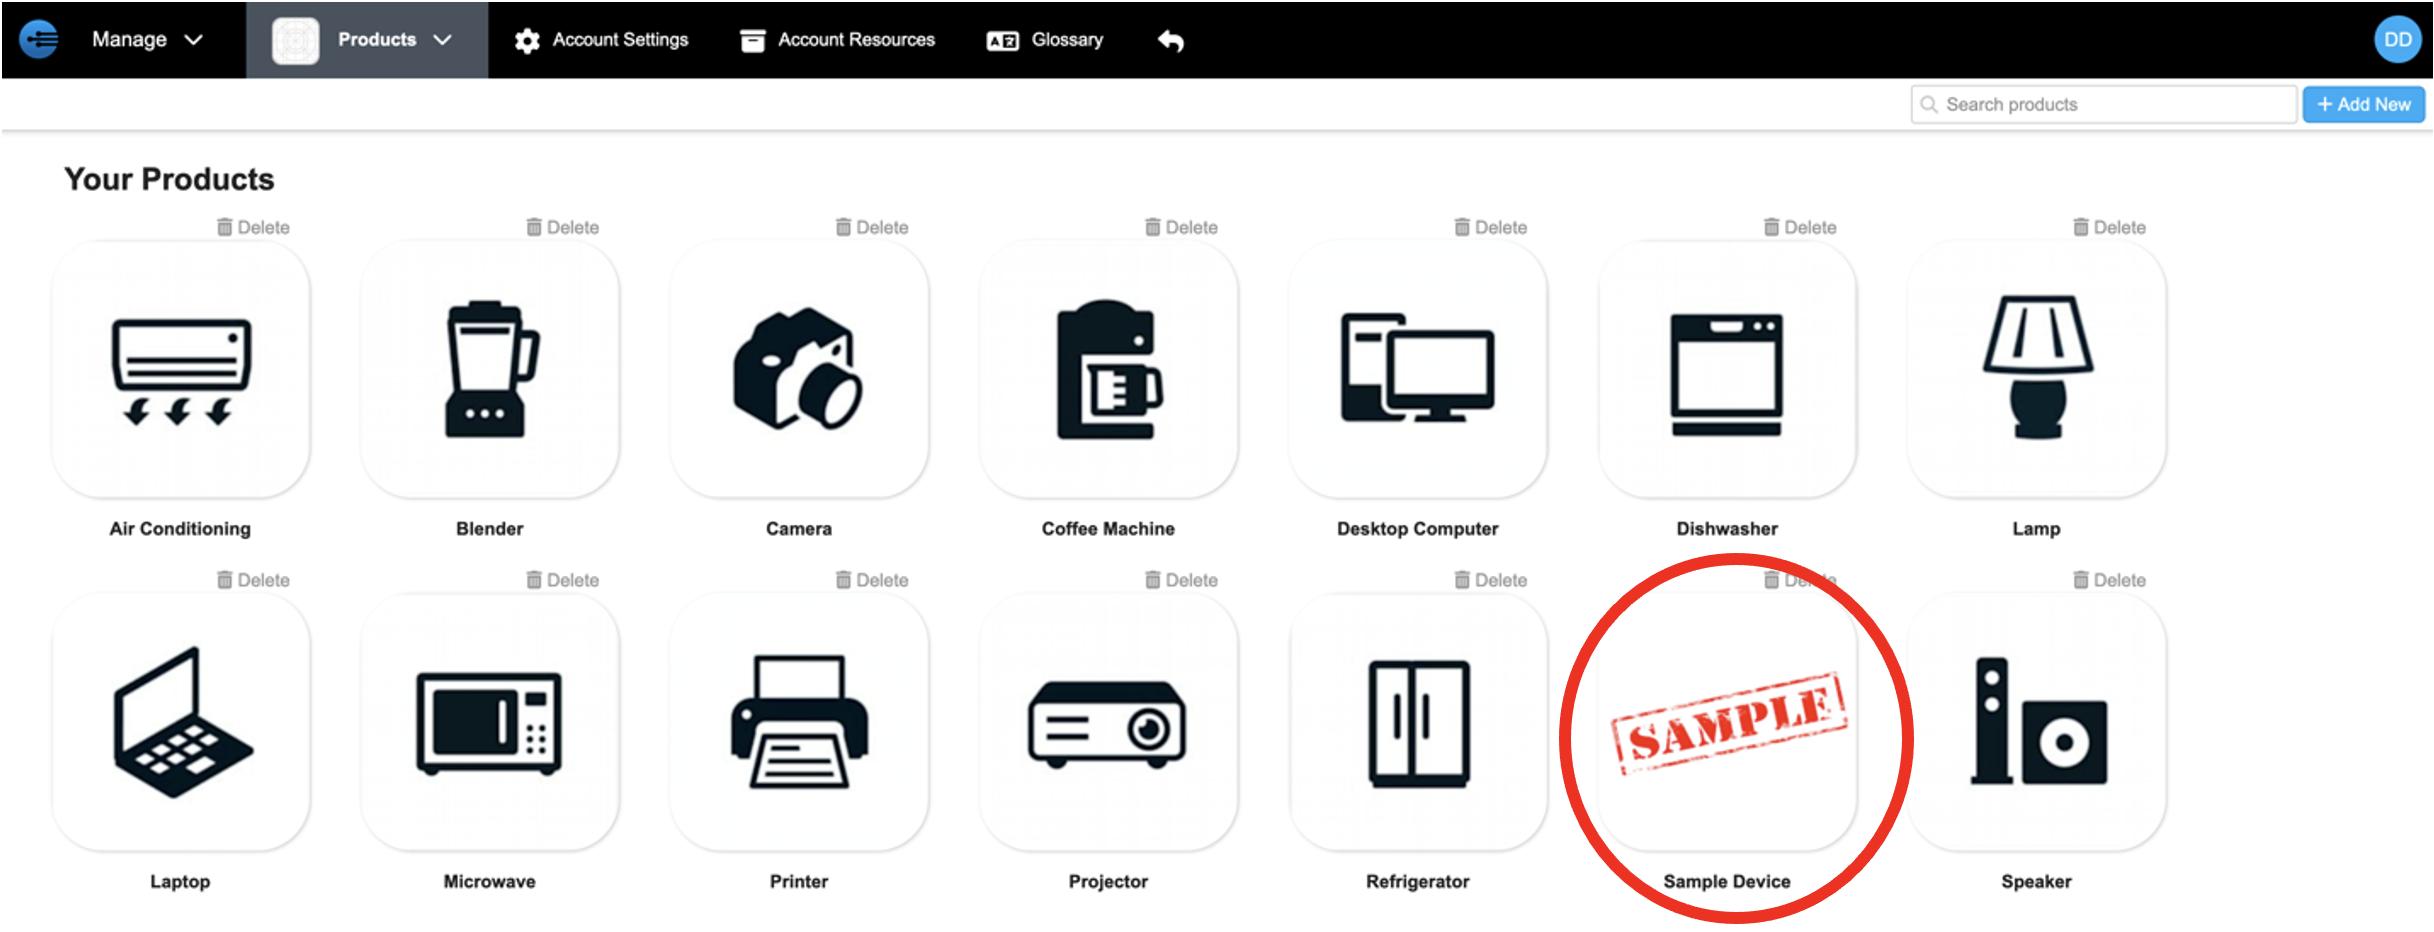
- On the products page, click on the piece of equipment you want to add a procedure to
- Under the expertise tab, on the left, click the plus sign to create a new task (procedure)
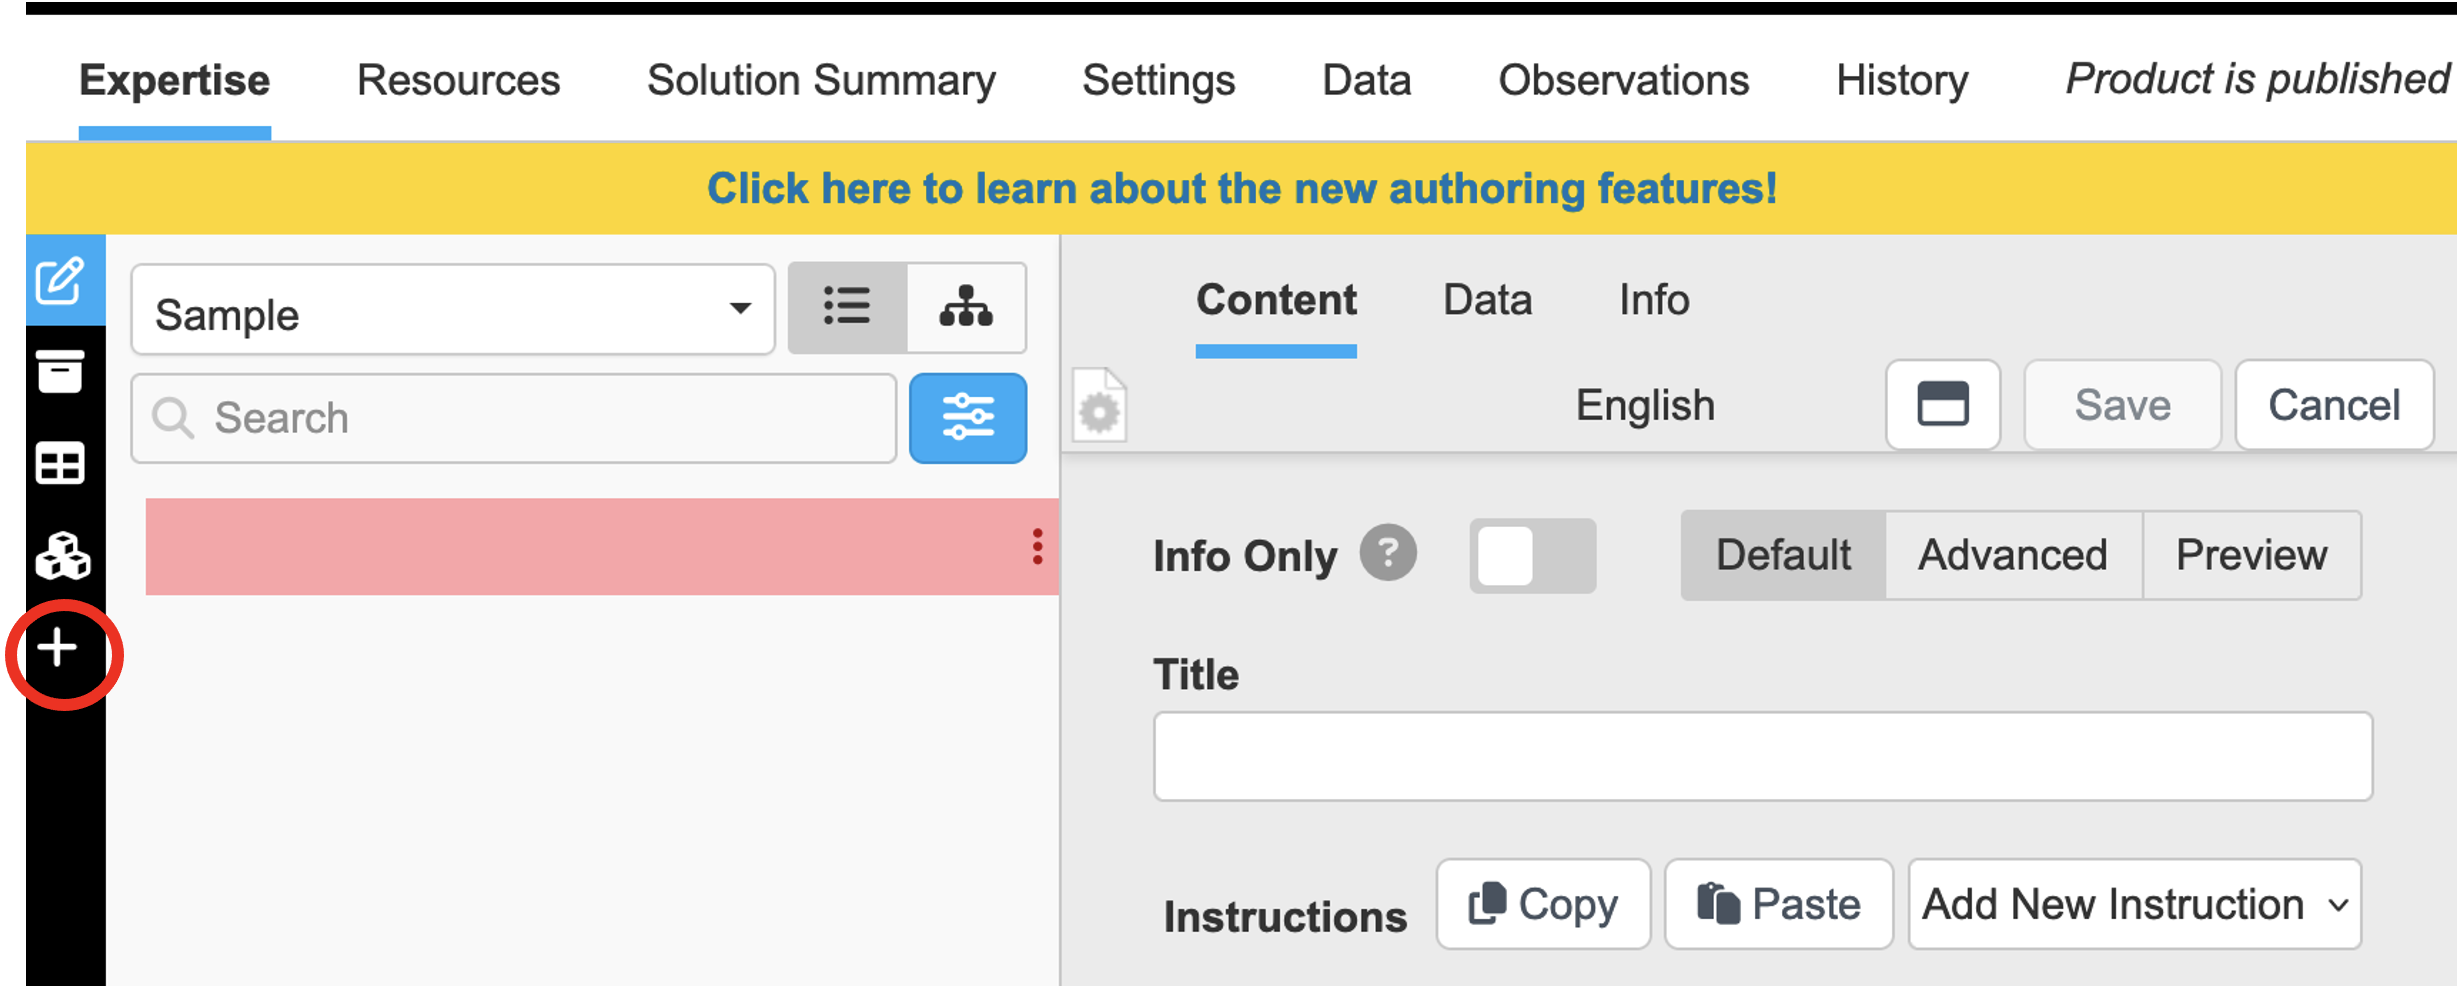
- Enter the title of task
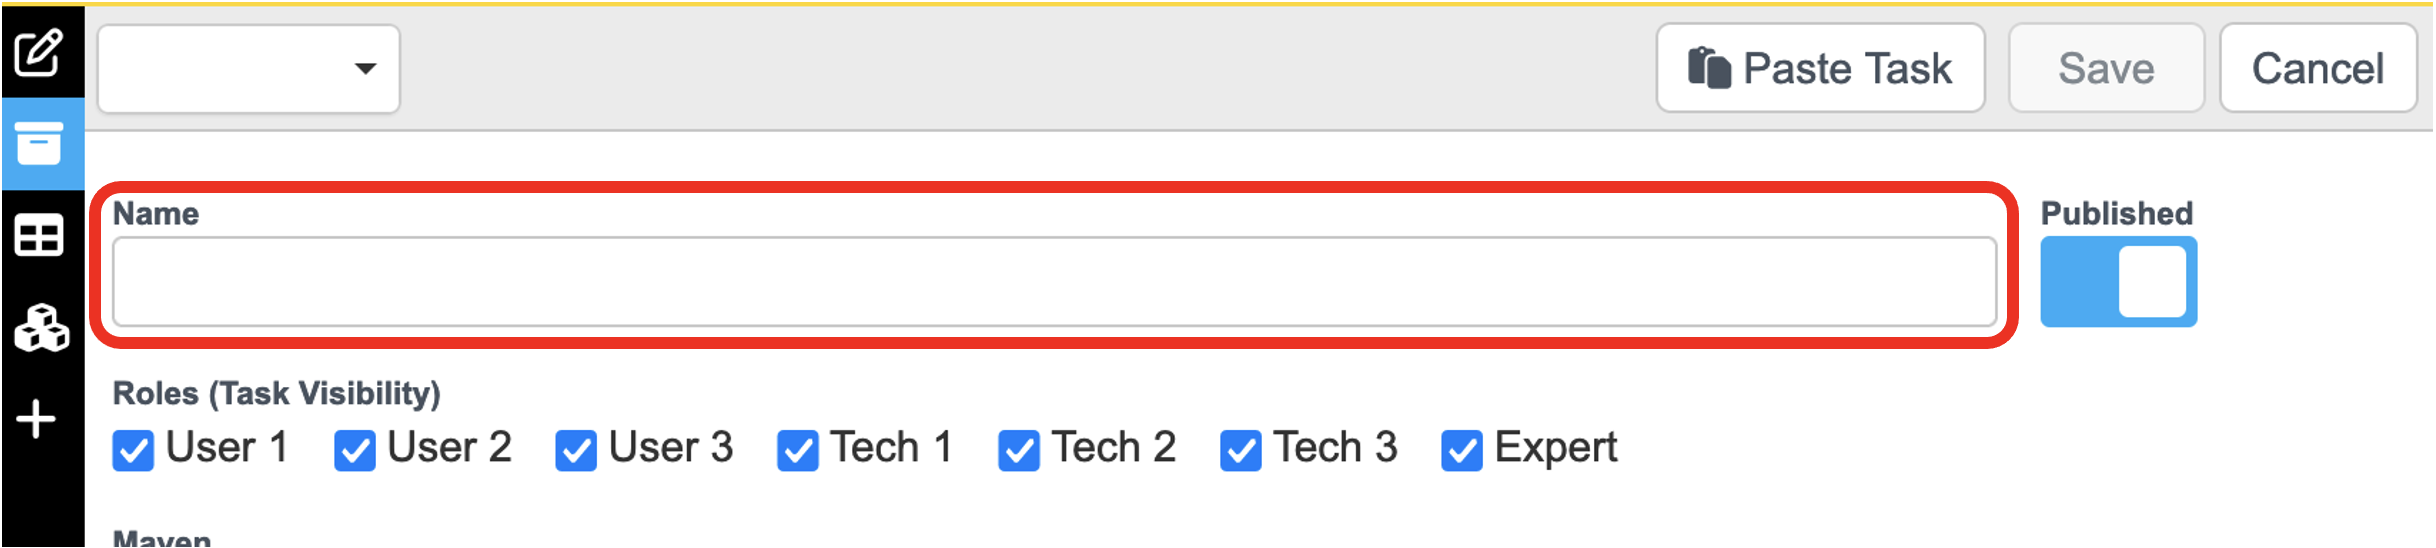
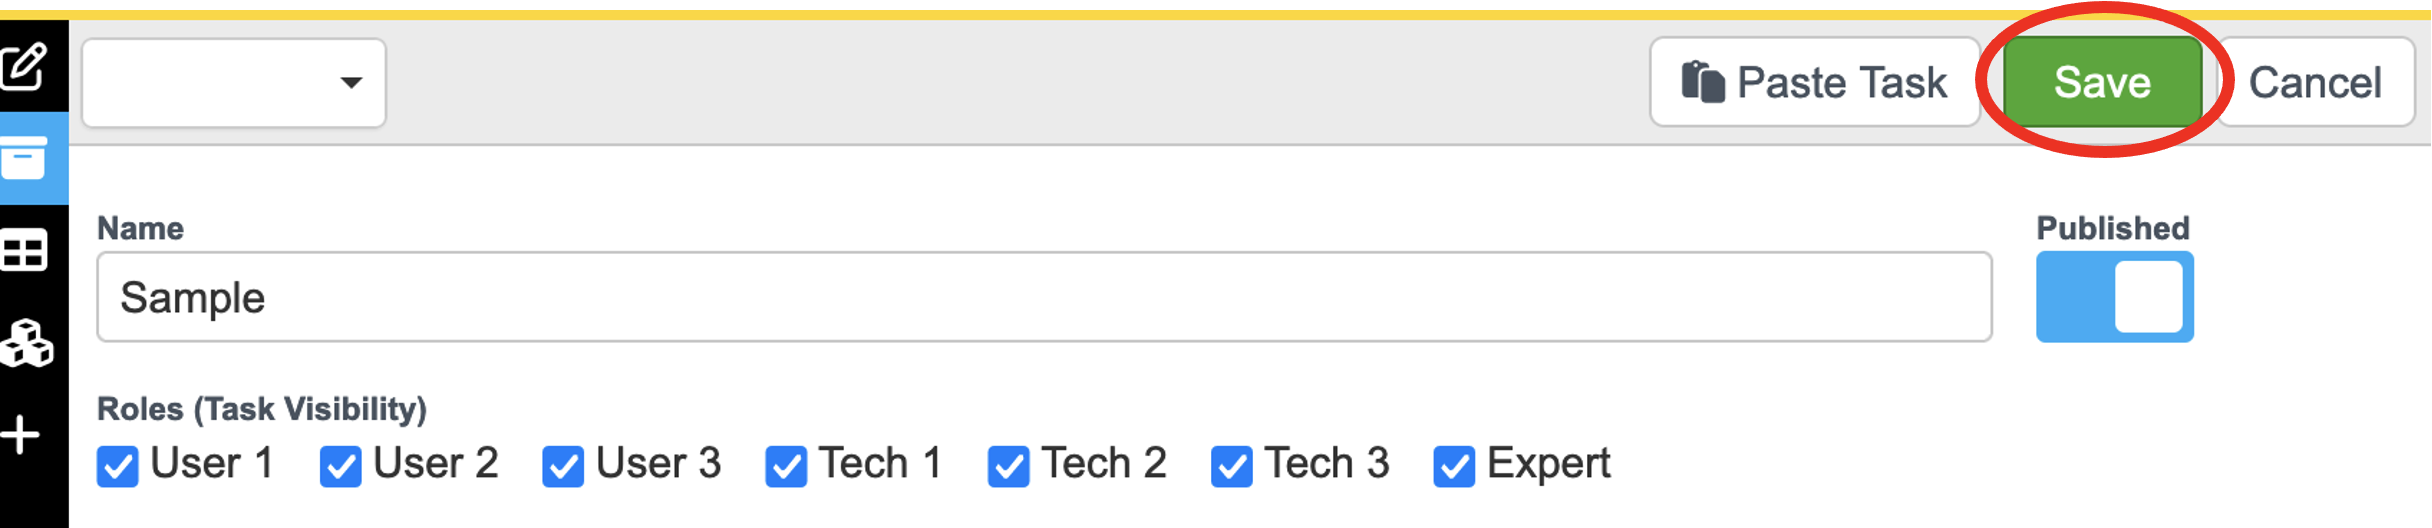
- Press Save
- After title is given, it will go automatically to the first step of task. At this point, enter the prompt you want to show up under “Title”
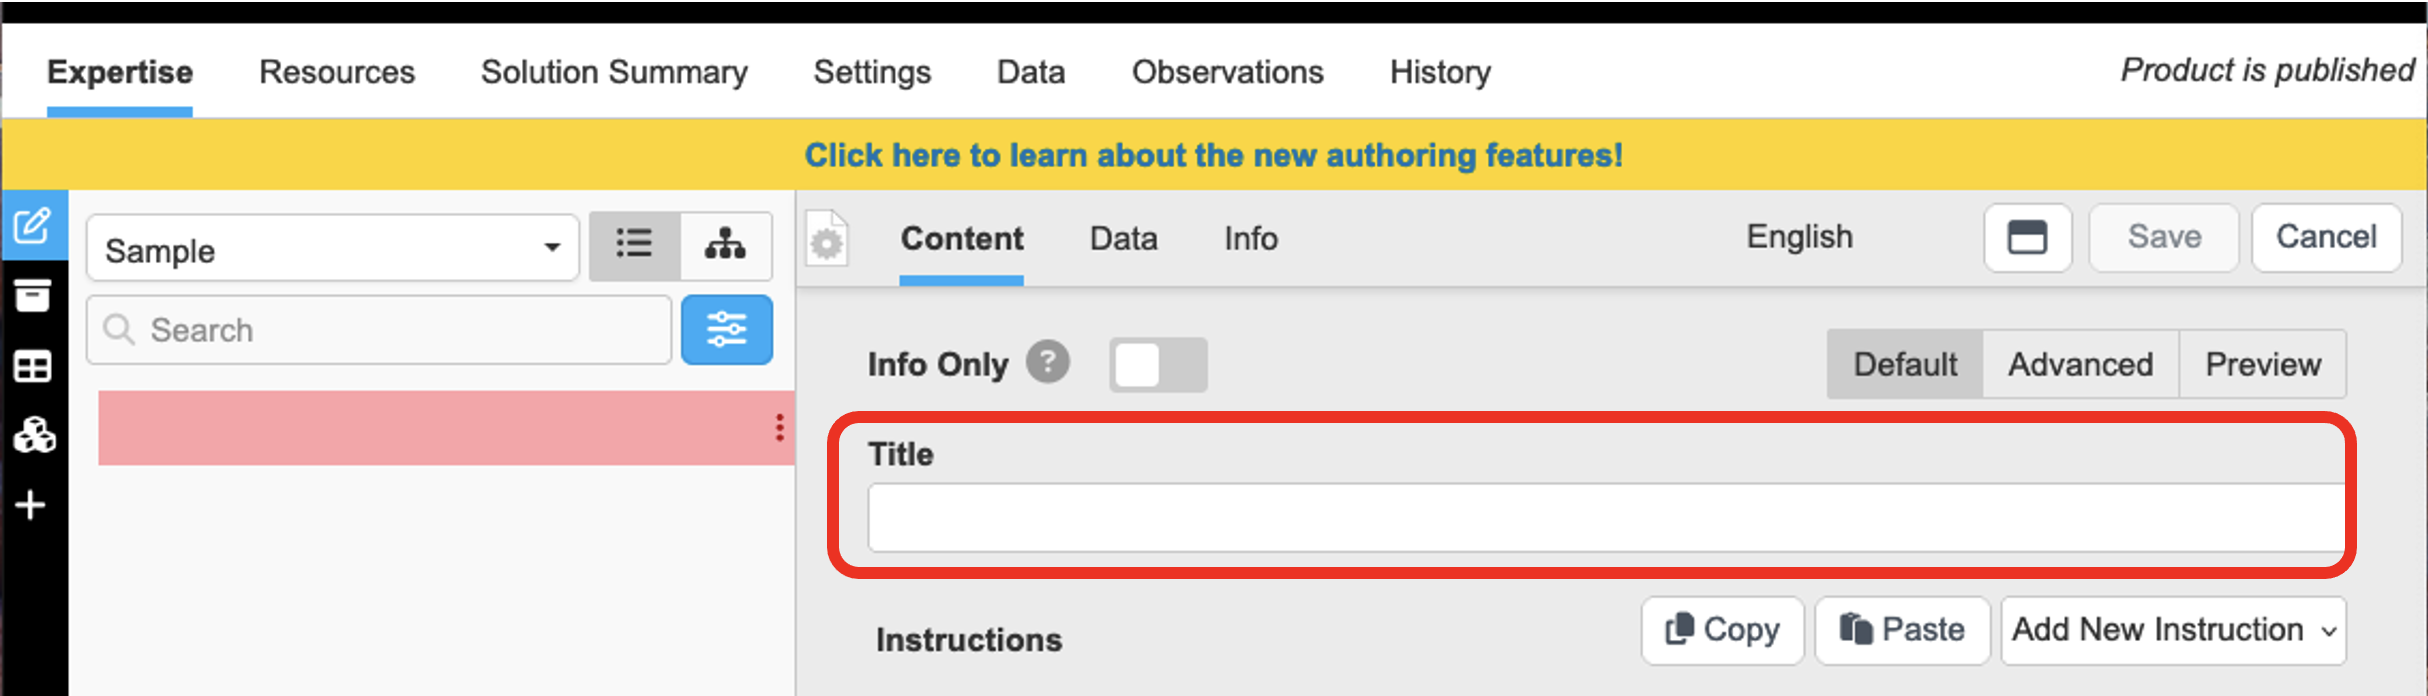
- To add details, click “Add New Instructions”
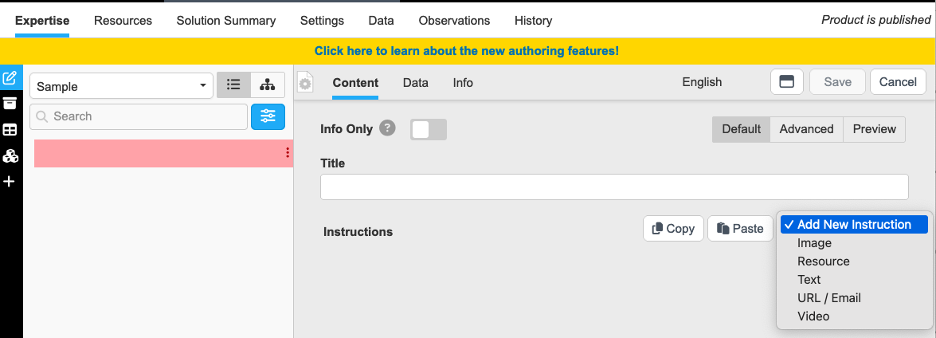
(These details will show up under the prompt of the step. Instructions can be input in the form of images, resources, texts, URL/Email, or videos)
- At this point "Info Only" should be enabled if the step is meant to inform the user without any result. If "Info Only" is not enabled this step will be a solution-based process where the procedure only proceeds if the problem persists (This is useful for troubleshooting/diagnosing)
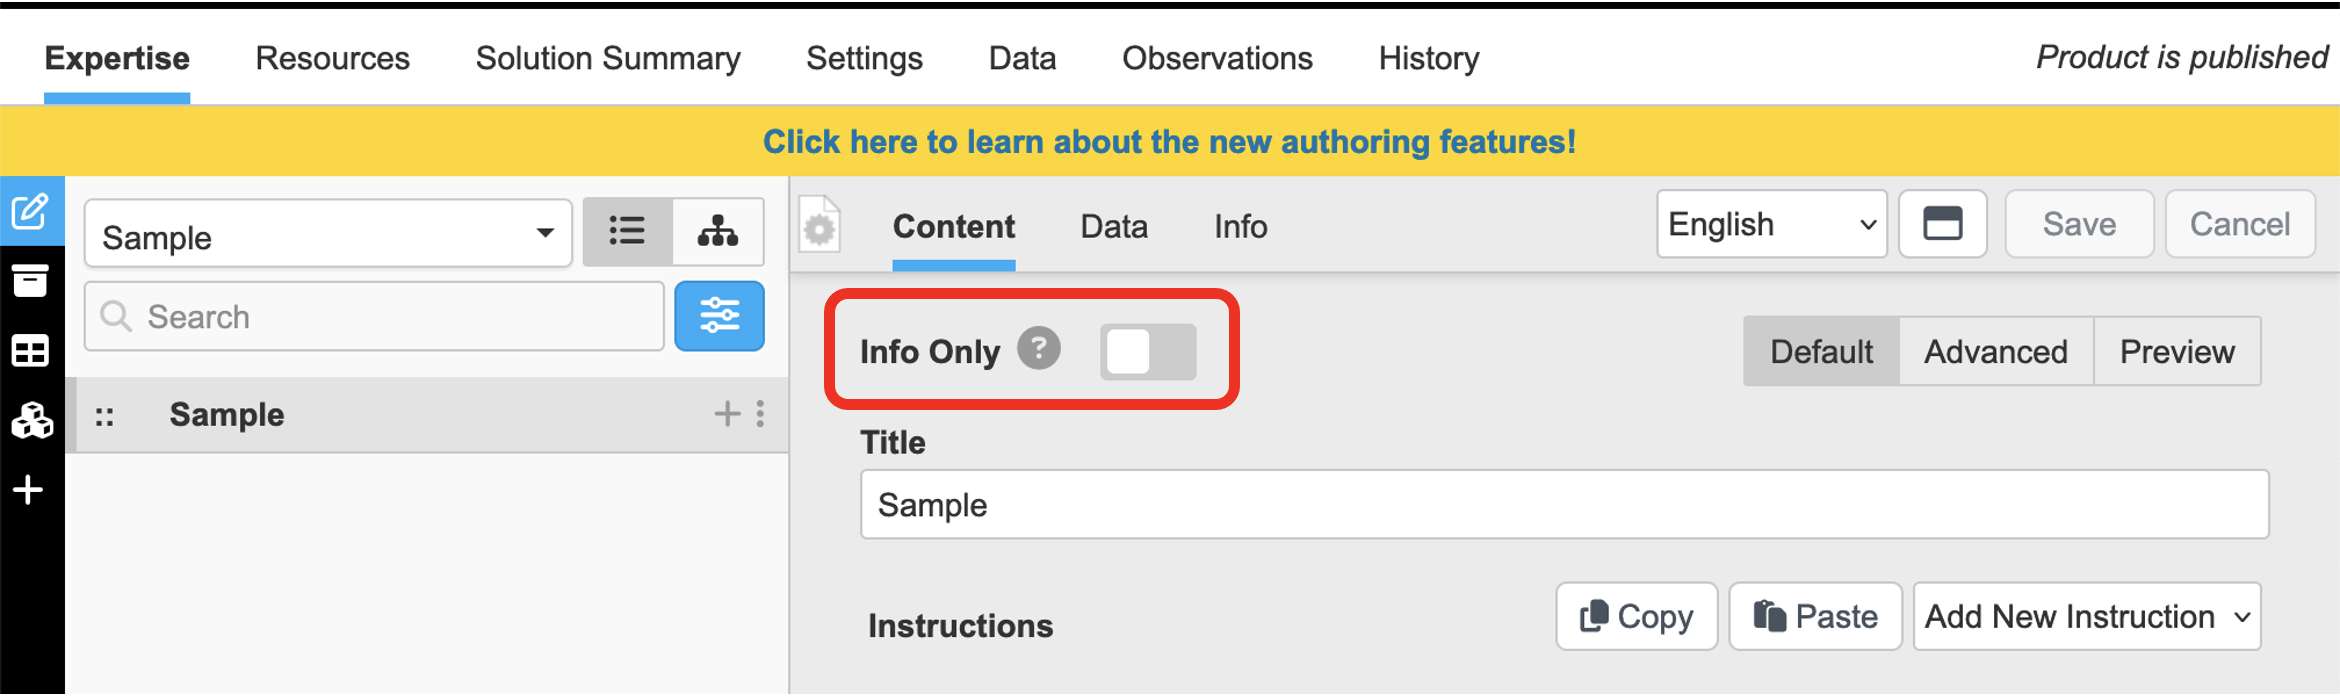
- Press "Save"

- Press the plus sign in the Step to add another step
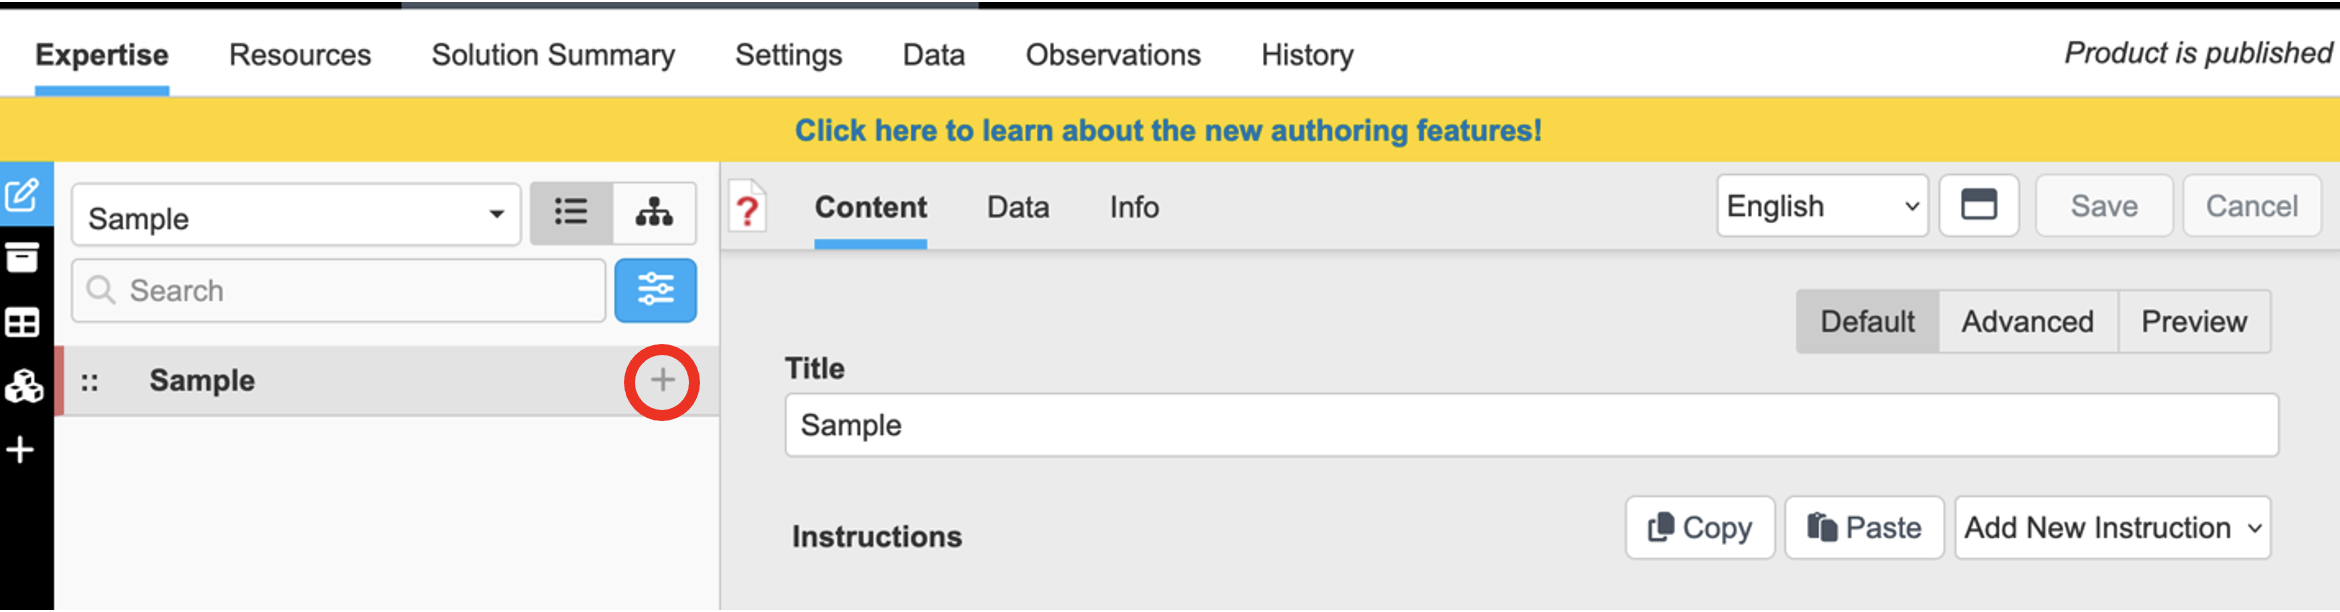
(Steps added will be shown on the left side in the form of an outline of the task process)
- Repeat steps 6-10 to add subsequent steps
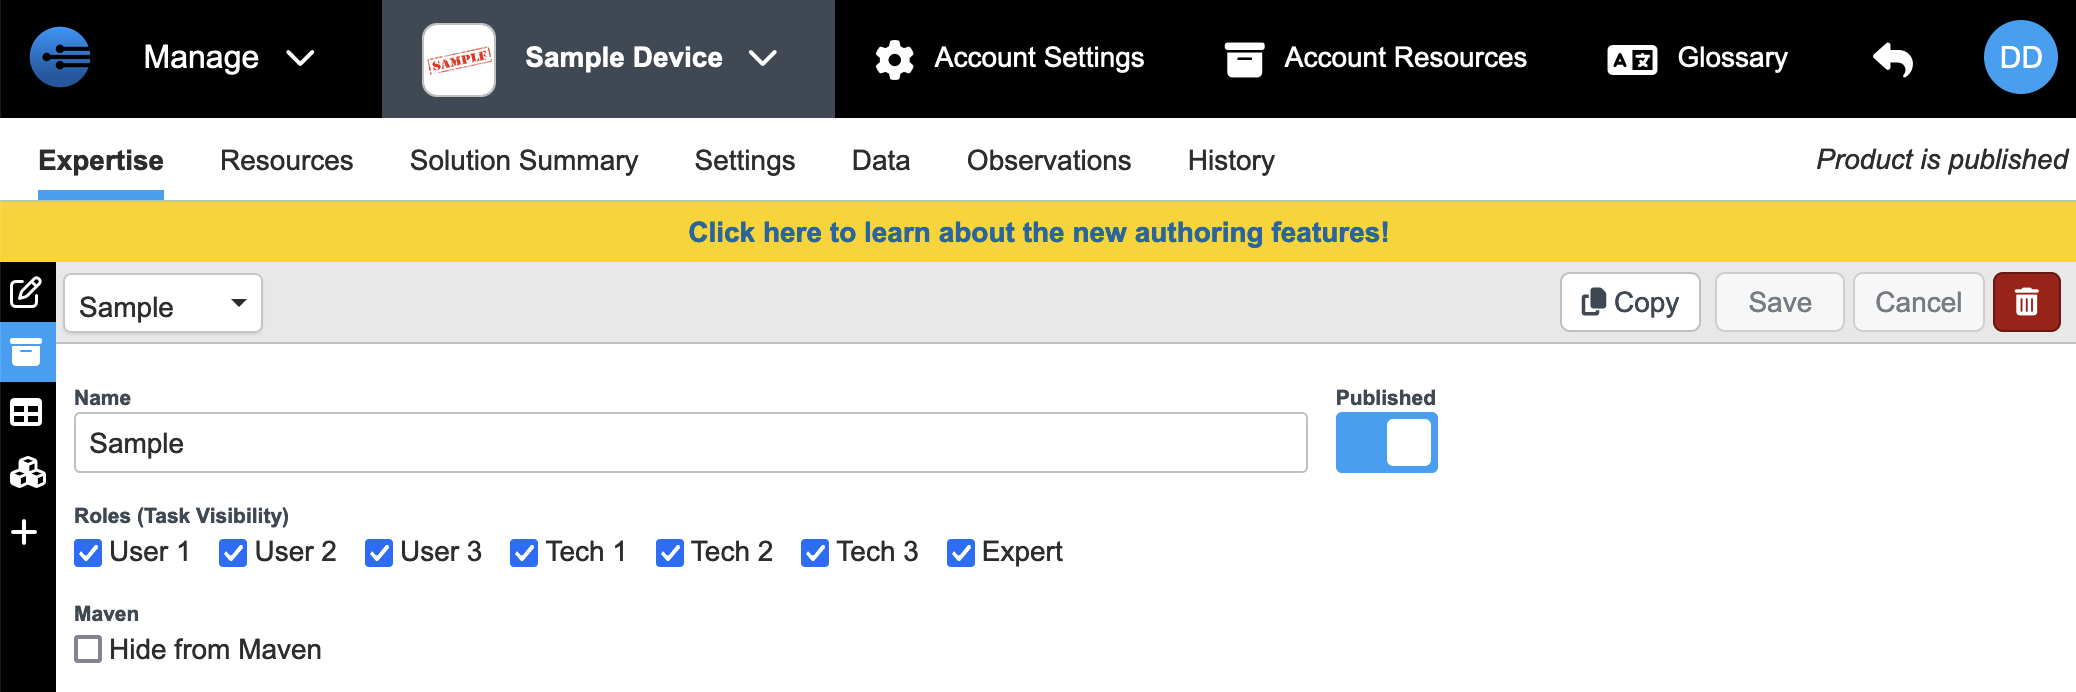
Task Visibility
Updated over 1 year ago