Authoring View
The Authoring of expertise has been improved and has a new look!
The default product view is Expertise, beginning with the Authoring view for your Tasks
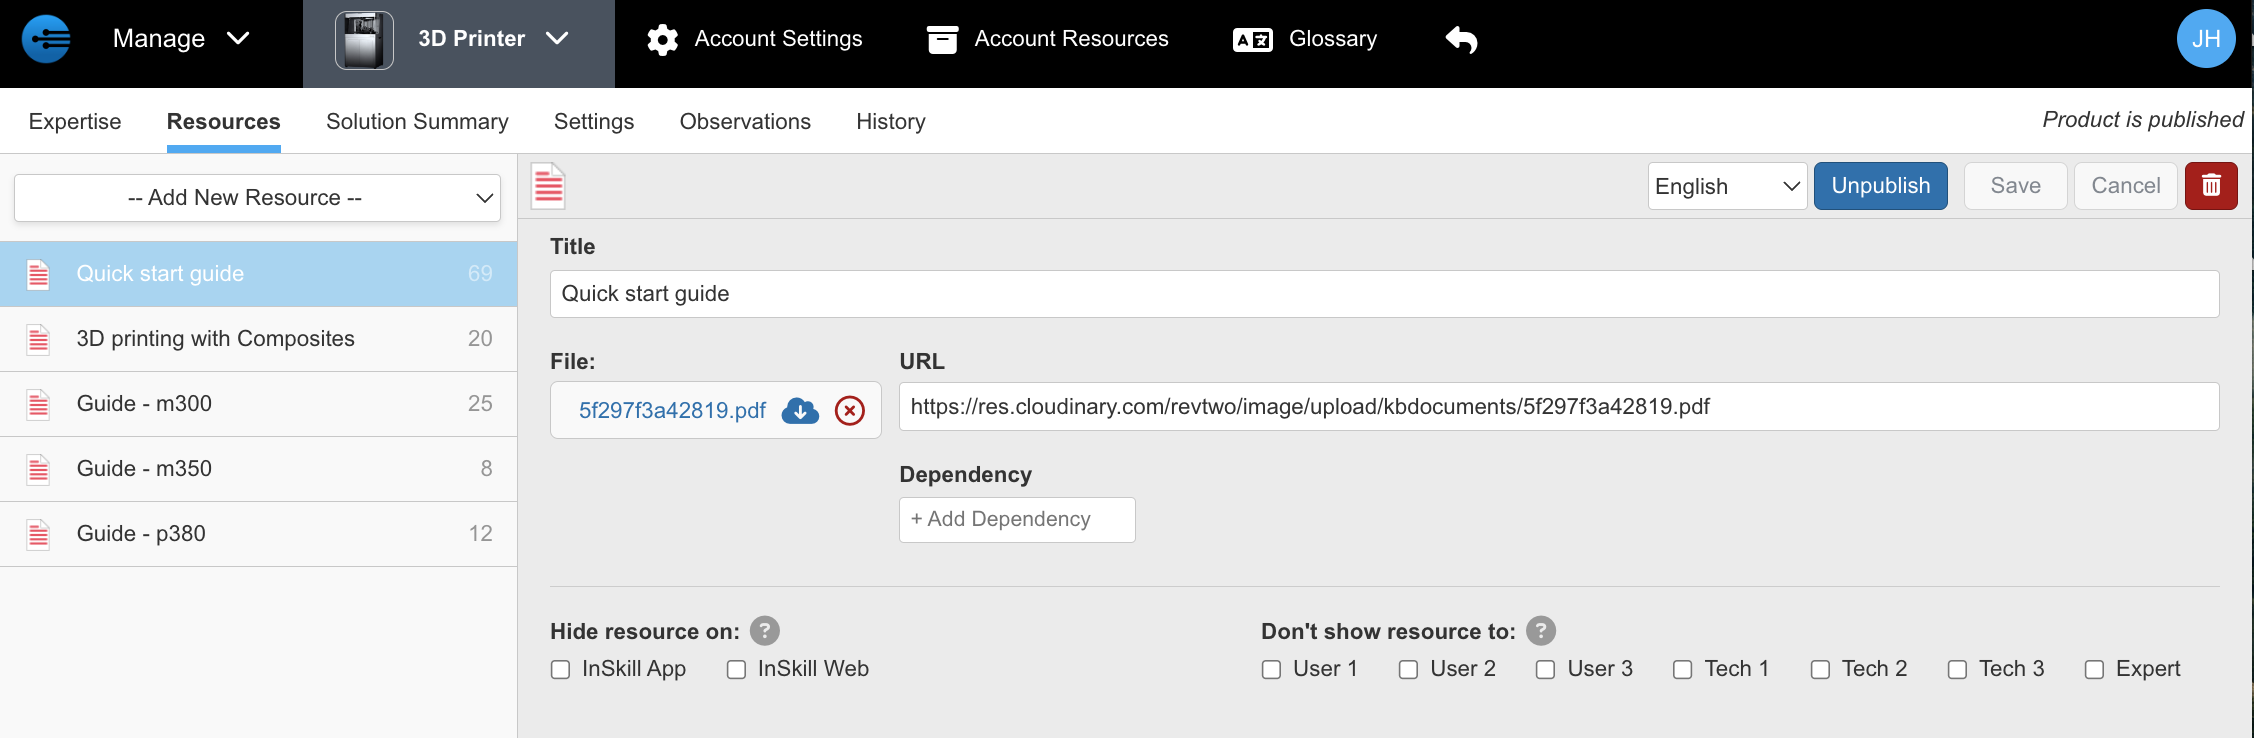
Next is Resources view to manage information related to your product
Content Tab:
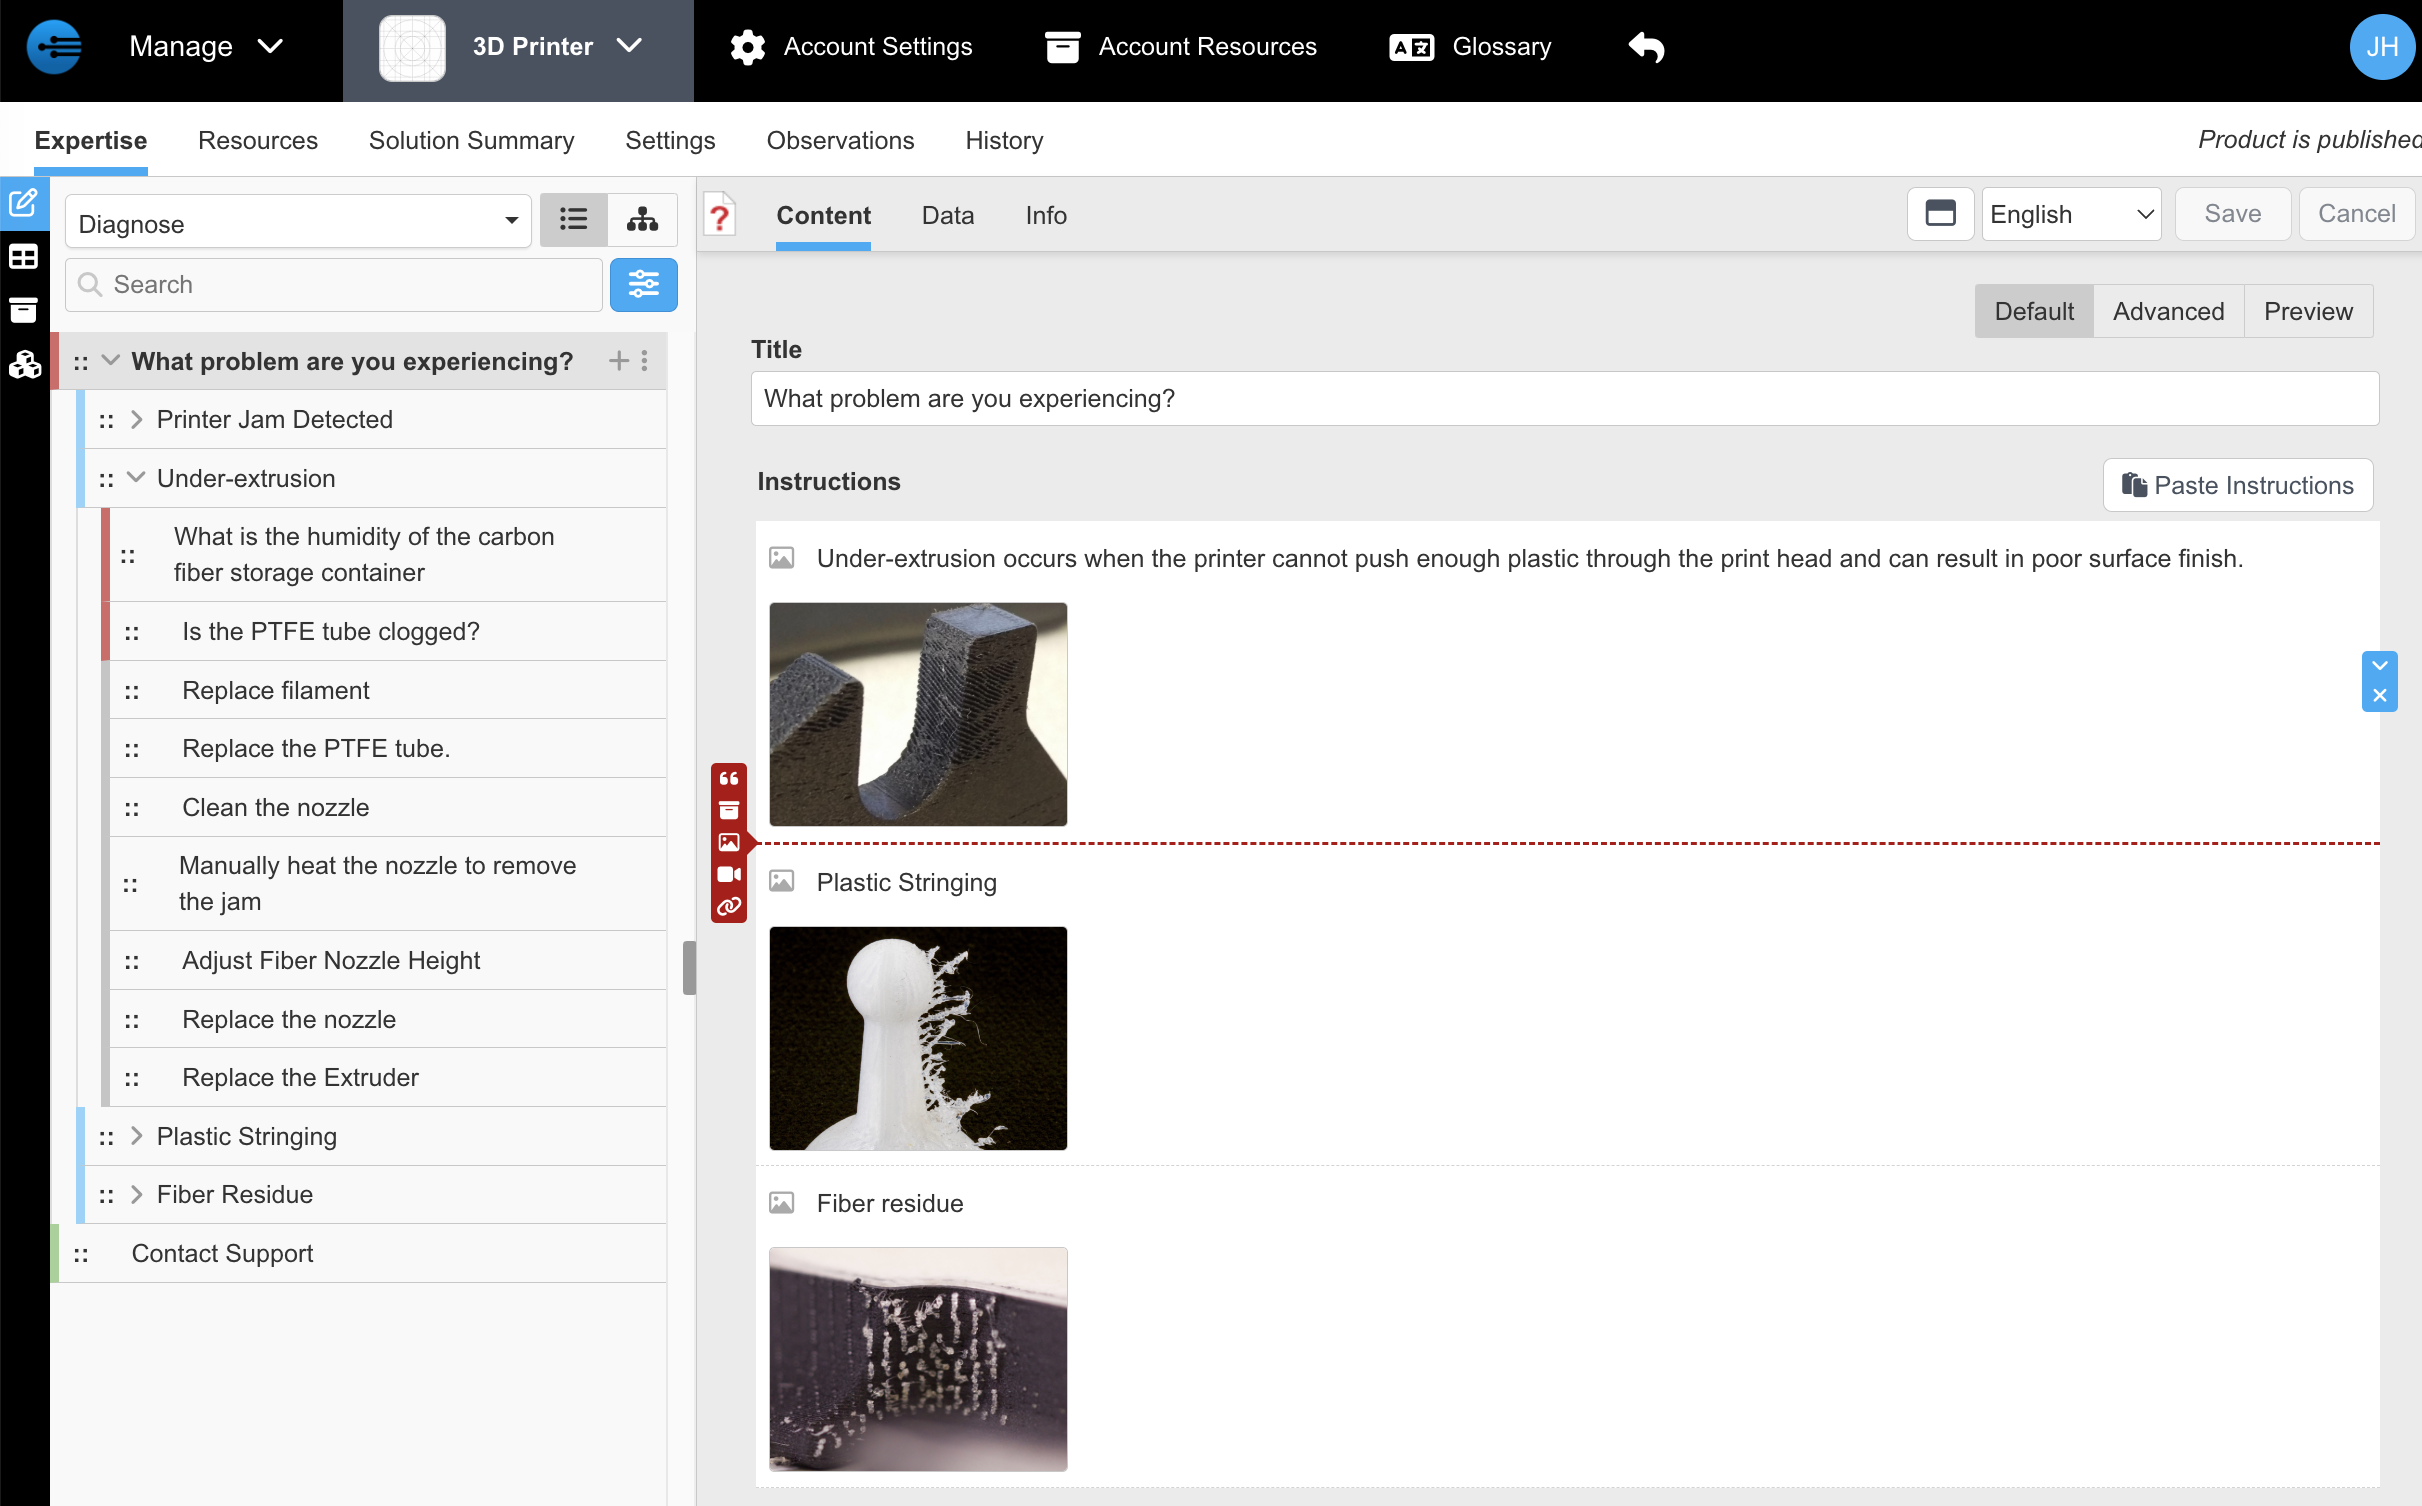
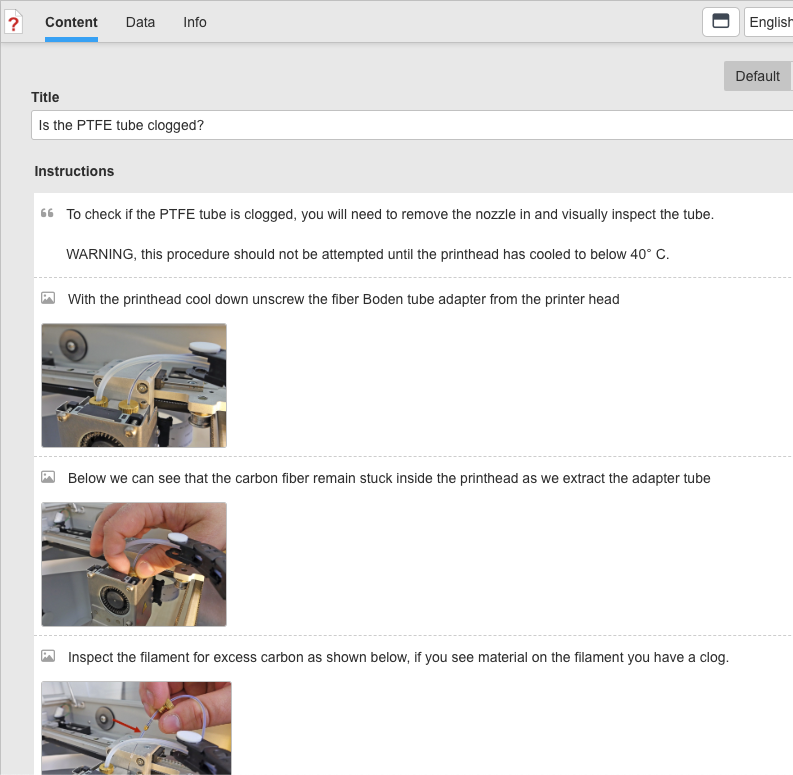
Each step includes a set of instructions. Instructions are bite-sized and more easily reordered. They are simple to create rather than full text formatting. Instructions are automatically numbered in the UI when they are presented to the user. This is what Instructions can look like when authoring:
To begin, select Add New Instruction and choose a type.
When one or more Instructions exist, you add by hovering the mouse where you want to insert. The red line indicates where to add, and the icons on the left are the types to add.


These buttons will insert Text, Resource, Image, Video, and URL Instructions.
The first option is Text, the simplest Instruction. Just type into the box. You can add a Dependency (EDIT LINK ********************)if this should be shown conditionally. On the right are blue controls. The x removes this Instruction. The undo will go back to the original of just this Instruction. And the up and down buttons move the instruction.

The second option is a Resources (EDIT LINK*******************) link. From the list, choose a resource
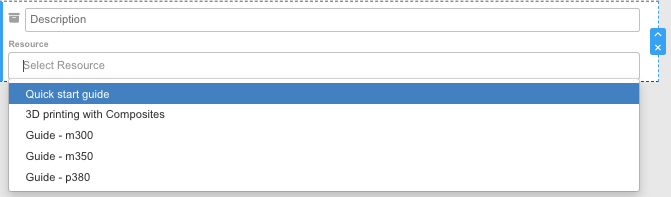
then when a resource is selected, if it is a PDF file, you can enter the page number to open. If a resource has a dependency like model = 300, you do not need to put a dependency on this instruction. It will use the original resource's dependency.

The Image or Video type has a description and a control to add a picture or video. If you click Browse, you will get the file browser to select a file. Or you can drag and drop a file onto the control. If you have a picture in a web page or document, it may be easier to copy the image and then click the control below and paste it in (using paste Ctrl-V). You don't need to save the picture as a file and import that file with the paste method.

Finally the URL / Email type has a description and URL. The format of URL must be http://domain or https://domain/path Or a valid email address such as name@domain. If the format is not correct, it will cause an error. If you enter an email address, it will be converted to a link like mailto:name@domain (the format used in web pages, etc.)
When a user taps the url link in this step, it will open a browser or the email client to send to this address.

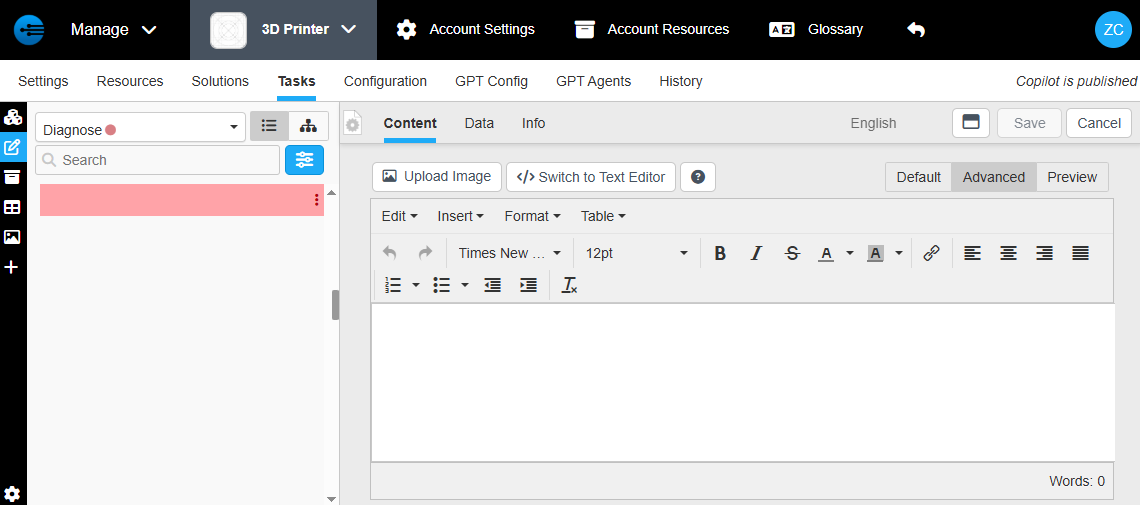
Advanced Tab:
In this tab you have the option to customize your step. You can use this instead of the default editor or in conjuction with it. Here you have a full text editor where you can edit everything from font to formatting as well as making tables and adding images. You can also press "Switch to text editor" to have full acess to the Inskill Scripting feature.
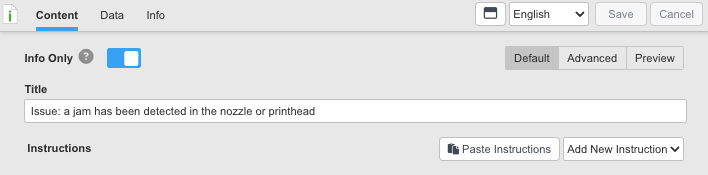
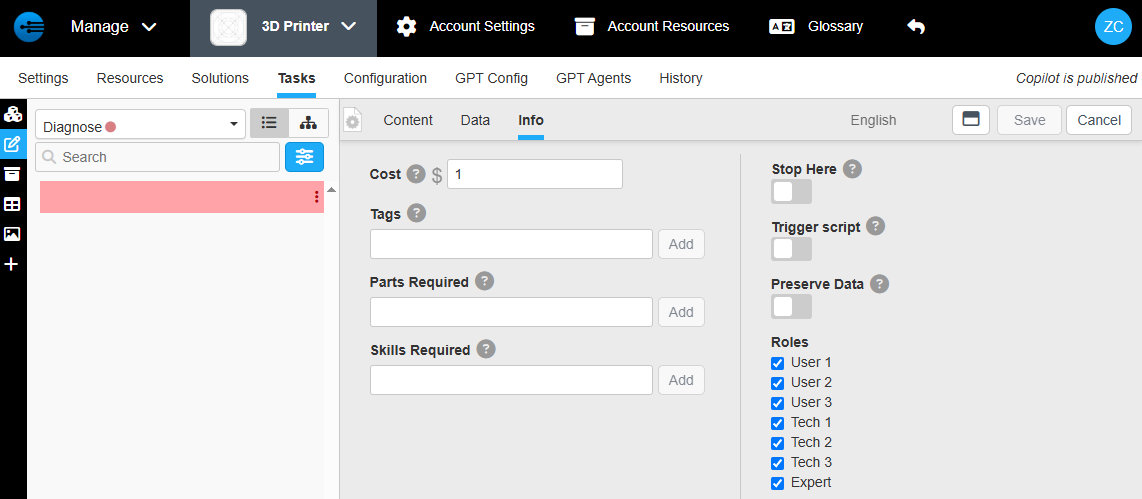
Info Tab:
In this tab you can edit add infromation such as Tags, cost, parts and skills required, as well as roles and the can choose features such as "Stop here" which will end the task, "Trigger script" for activating a custom script and "Preserve data" for preserving data users have entered if they revert to the previous step.
UPDATED?: Is this correct spot?
Configuring Your Copilot: The Authoring Hub
To begin editing a copilot, simply select the desired project from your dashboard. This will bring you to the Copilot Configuration Page, the central engine where you build, refine, and manage the intelligence of your AI assistant.
The configuration interface is organized into eight specialized tabs, allowing you to control every aspect of the copilot’s knowledge and behavior.
The Configuration Tabs
- Settings: Manage general metadata, branding, and core operational parameters.
- Resources: Upload and organize foundational knowledge—manuals, videos, and documentation—that the copilot will reference.
- Solutions: Curate and approve the "gold standard" answers derived from field expertise and support history.
- Tasks: Build and edit step-by-step guided procedures and interactive decision trees.
- Configuration: Define variables and data dictionaries that allow the copilot to recognize specific asset configurations and serial numbers.
- GPT Configuration: Fine-tune the AI’s personality, prompting logic, and response style.
- GPT Agents: Deploy specialized agents to perform complex calculations, connect to private systems, or execute custom scripts.
- History: Access a comprehensive audit trail of all changes, updates, and interactions within the copilot’s lifecycle.
Managing Logic and Dependencies
Beyond simply adding content, the Configuration Page is where you establish the logic that makes your copilot intelligent. By utilizing these tabs, you can:
- Define Asset Context: Configure variables so the copilot can distinguish between different machine models or site-specific setups.
- Establish Dependencies: Set rules for Resources, Tasks, Agents, and Solutions so they only appear when specific conditions are met (e.g., only showing a "Large Filter" task for "Large" machine types).
- Control Visibility: Manage granular role-based access to determine which users (Technicians, Operators, or Customers) can see specific pieces of knowledge.
The Big Picture
This hub is where you transform raw information into a secure, context-aware digital expert that reflects your organization's exact standards.
Updated 8 days ago